Difference between revisions of "SoapUI integration"
| Line 2: | Line 2: | ||
| − | [http://www.adictosaltrabajo.com/tutoriales/tutoriales.php?pagina=introduccion-soapUI | + | [http://www.adictosaltrabajo.com/tutoriales/tutoriales.php?pagina=introduccion-soapUI This] link is an introduction to soapUI and a guide to create a project. |
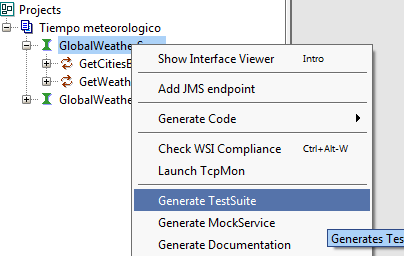
After we created the project, we will create the TestSuit, for this we right click on the service we will test and choose the option Generate TestSuit | After we created the project, we will create the TestSuit, for this we right click on the service we will test and choose the option Generate TestSuit | ||
[[Image:SoapUI1.png |center ]] | [[Image:SoapUI1.png |center ]] | ||
Revision as of 14:50, 20 December 2013
Creating the SoapUI project
This link is an introduction to soapUI and a guide to create a project. After we created the project, we will create the TestSuit, for this we right click on the service we will test and choose the option Generate TestSuit
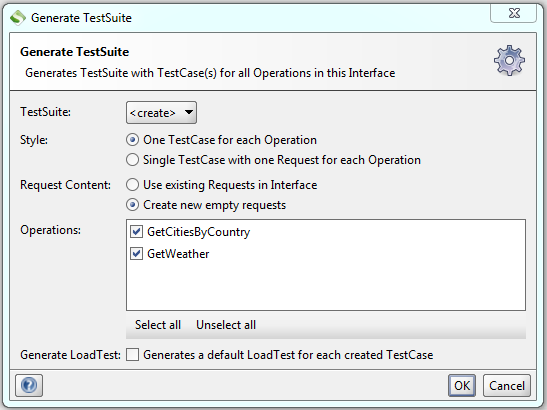
This displays the following window
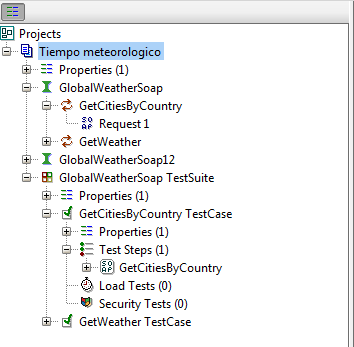
In which we choose the operations for which we are going to define test cases, if we can make a case for operation or a case with all operations contained and if we want to generate load tests. This we will leave as the default. After we have the TestSuit click the icon that is above the project tree, this will make the properties visible in the tree.
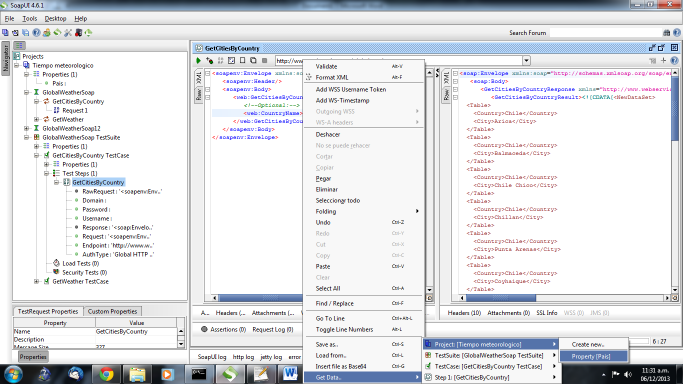
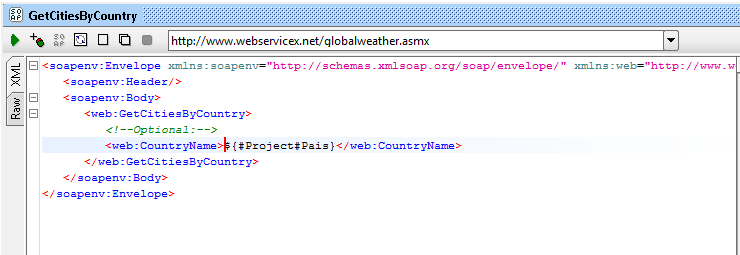
We right click to properties that are defined in the next level of project name and choose Add Property. This defines a property project level. Now we have to put a name, in this case we will use Country, this creates a new element in the tree. If we double click we will be able to define it a value, leave it empty for now. The Properties we define here, we are going to use as parameters to calls to web services. Now we have to modify the parameter with which web services are called by the name defined in the properties parameter. To do this, open the case where we want to parameterize, we give right click on the position where you have to set the parameter and choose Get Data, Project and name of the property that we define.
The request will be:
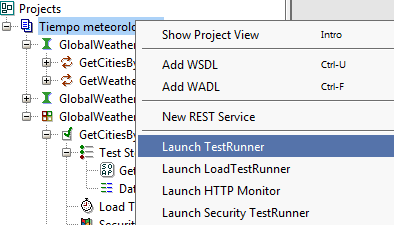
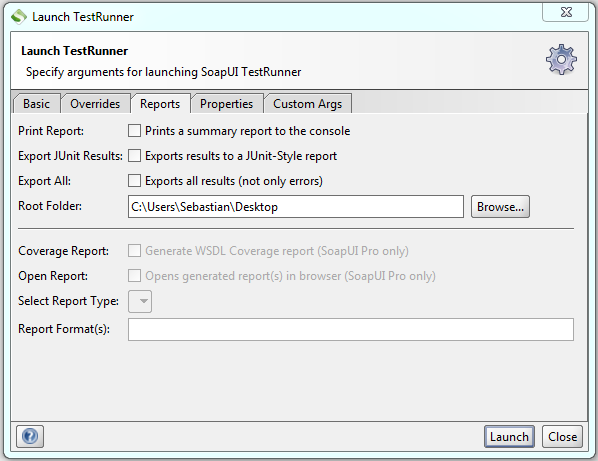
After changing all the web services to take the parameters, we will get the command to use from gxtest, for this we right click on the project and choose the option Launch TestRunner
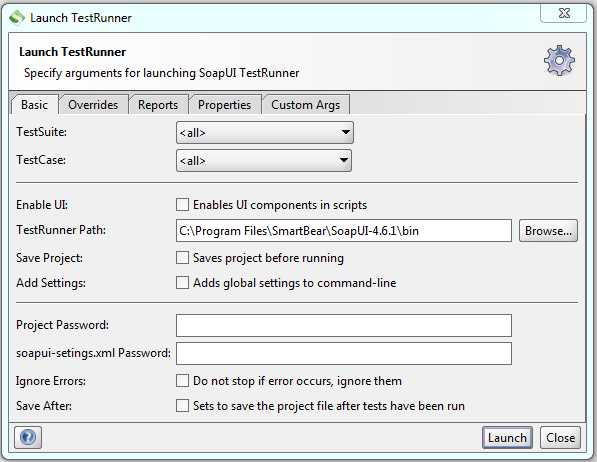
This shows a window in which we will have to modify Basic, Report and Properties tabs.
In Basic we need to specify the path where the TestRunner, which is in the path where the program is installed in the bin folder, and can also indicate if we are to test all TestSuit or any particular case.
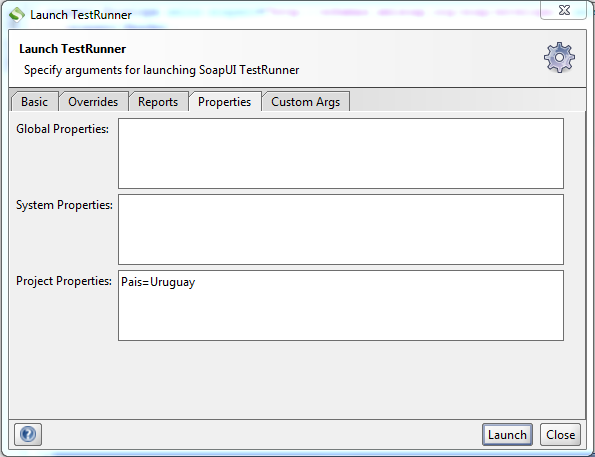
In the Properties tab define the values for the parameters defined above, with parameter = value syntax.
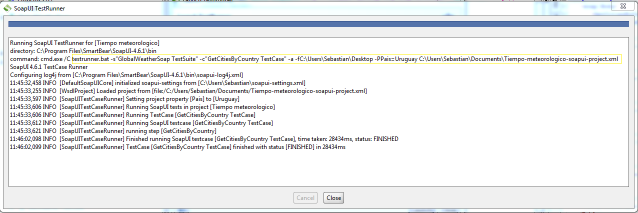
In the Report tab can indicate where to save the logs of the test. If you check Export All we always generate the report, but only in case of error. Then we click Launch and that is going to run the selected tests, from here we will get the arguments that we use with gxtest.
-s The suite where the test case.
-c The test case.
-a To save logs always.
-f It is the path where the logs are to be saved
-P It is the value you select for the Country parameter, in case you want to pass a parameter to a datapool of Spain GXTest the value will change.
C:\Users\Sebastian\Documents\Tiempo-meteorologico-soapui-project.xml
It is the path where the project is located
Running in GXTest
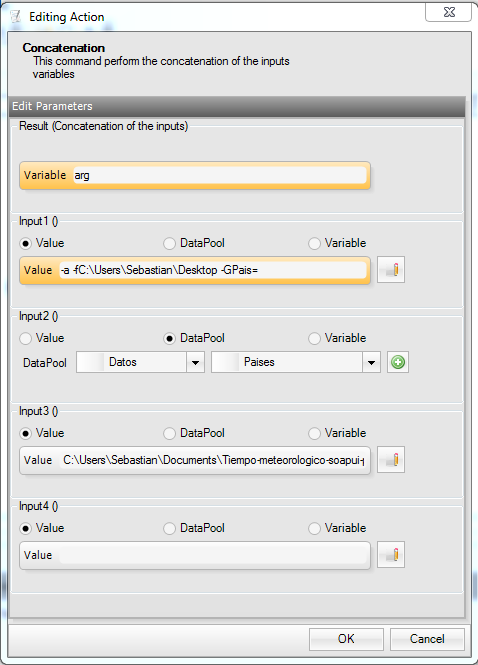
To run soapUI tests with data obtained from Datapools of GXTest we will use the testrunner.bat included in soapUI, for that first we have to do is get the parameters as we saw before, for example -a -fC:\Users\Sebastian\Desktop -GPais=Spain C:\Users\Sebastian\Documents\Tiempo-meteorologico-soapui-project.xml After this we create an Action Concatenation in which we will add these parameters
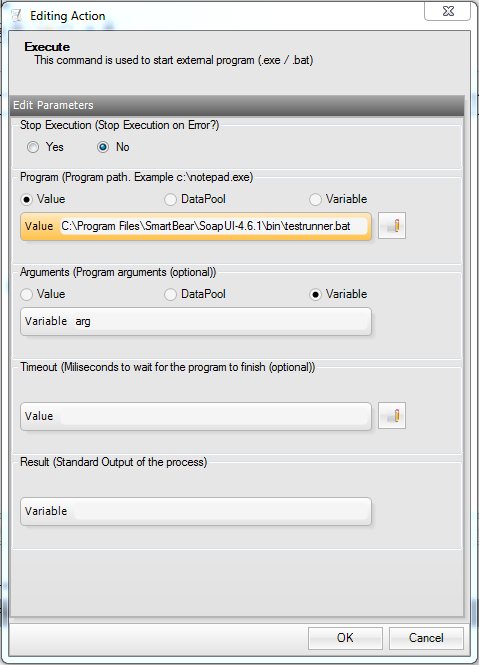
Here we add the parameters that will be used and changed by the value of the datapool. After that you have to make the call to the TestRunner so that we create an Action Execute
Here we put the path where the testrunner.bat and the argument that we define is Concatenation.
Resources
Here are the files to follow the example described.
1. Download the KB sample from this link
2. Download SoapUI project from this link
3. Download GXTest project from this link
