SoapUI integration
SoapUI can be used along with GXtest to invoke complex WebServices during the execution of a GXtest test case. This article explains how to integrate a SoapUI call into GXtest.
Creating the SoapUI project
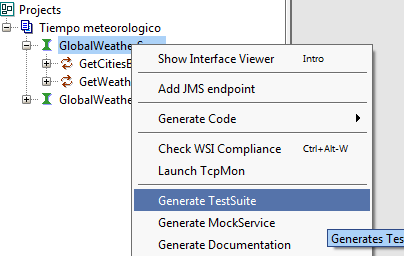
This link is both an introduction to soapUI as well as a guide for creating a project. After creating the project we will also be creating a Test Suite. Let's get started, the first thing we should do is right clicking on the service we will be testing, after which, we will choose the option Generate Test Suite:
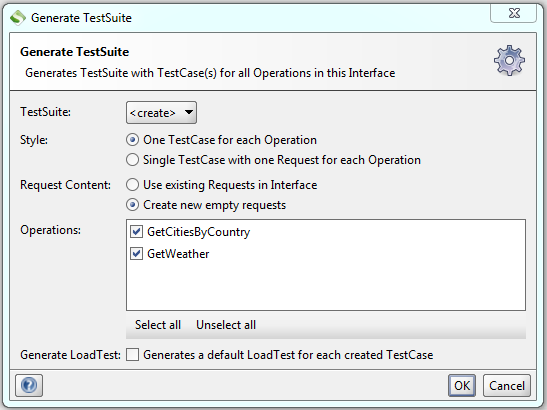
The following window should be displayed on screen:
From that window we will be choosing the operations for which we are defining the test cases, whether it is either a single test case per operation, or a test case containing all the operations in it, or, if we are keen on generating load tests. For this particular example, we will be using the default configuration.
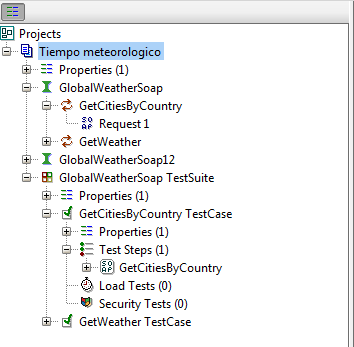
After we have the Test Suite created, click on the icon which is above the project tree, that will make the properties visible in the tree.
From the properties option, available a level underneath the project's name, we will choose the option Add Property, it will let us define a Project Level Property. Next, we need to add a name, for this example we will employ Country, and doing so creates a new element in the tree. For so long as we double click on it we will be able to provide it with a value, however, and for the sake of this example it will remain blank for now.
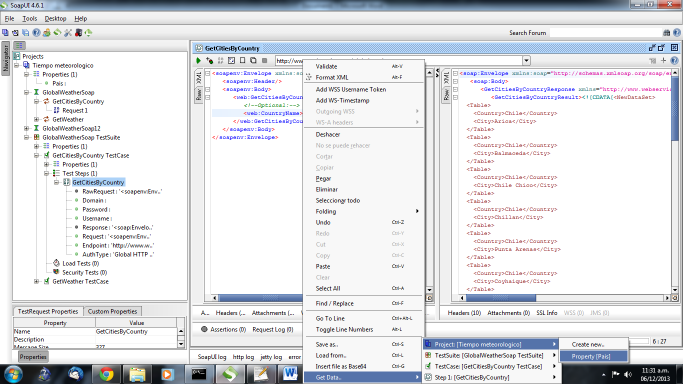
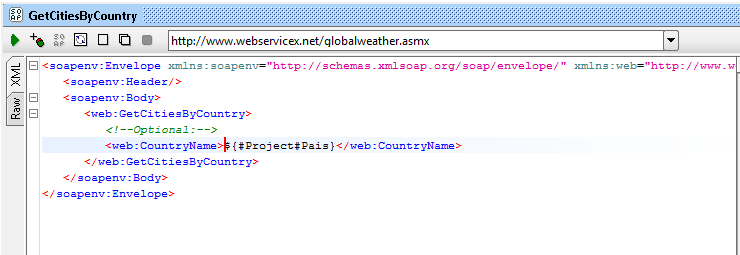
Bear in mind that the Properties we defined here, are going to be used as parameters to call web services. Having that said, now we have to modify the parameter with web services which are being called by the name defined in the properties parameter. In order to do so, open the test case we want to parameterize, then right click on the position where you have to set the parameter and choose Get Data --> Project and name of the property that we define.
The request will be:
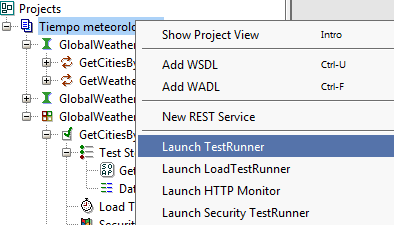
After changing all the web services to accept the parameters, we will have available the command to use from GXtest, right click on the project and as portrayed in the following screenshot, choose the option Launch TestRunner
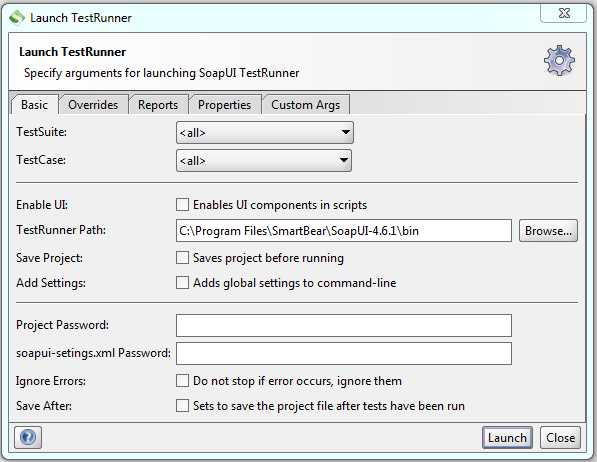
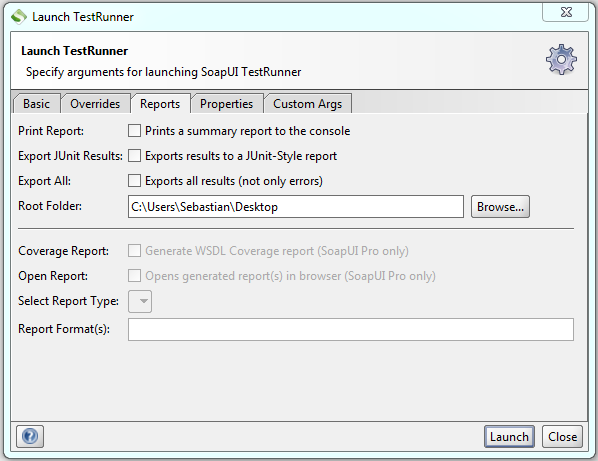
That action will display a window in which we will modify the three following tabs Basic, Report and Properties.
In Basic we need to specify the path where the TestRunner, which is the path where the program is installed in the bin folder, and can also indicate if we are to test all Test Suites or a test case in particular.
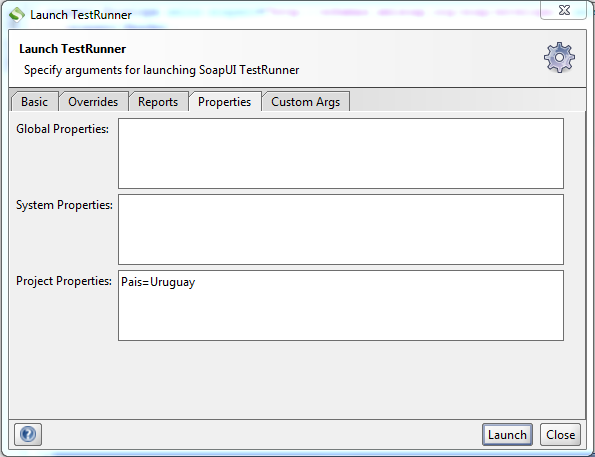
In the Properties tab we will define the values for the parameters defined with the following syntax parameter = value.
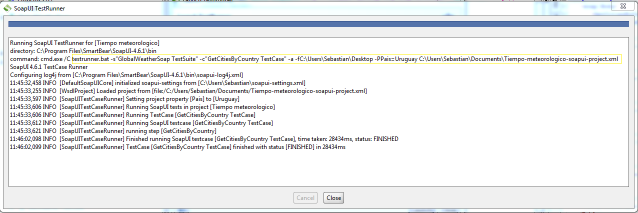
In the Report tab we can indicate where we would like saving the logs of the test case. Provided the Export All option is checked, we will always generate the report, yet only in case of an error. Lastly, clicking Launch is going to run the selected test cases, from that point is where we will get the arguments that we will use with GXtest.
-s The suite where the test case is located.
-c The test case itself.
-a To always save logs.
-f It is the path where the logs are to be saved
-P It is the value you select for the Country parameter, in case you want to pass a parameter to a datapool of Spain GXtest the value will change.
C:\Users\Sebastian\Documents\Tiempo-meteorologico-soapui-project.xml
It is the path where the project is located
Running in GXtest
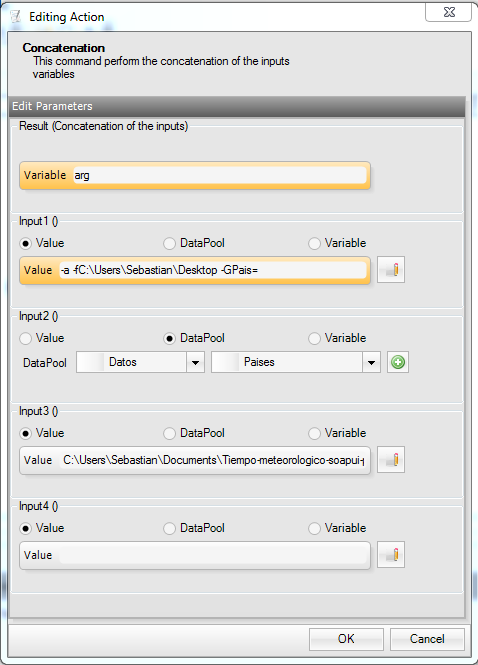
To run soapUI tests with data obtained from Datapools of GXtest we will use the testrunner.bat included in soapUI, for that first we have to do is get the parameters as we saw before, for example -a -fC:\Users\Sebastian\Desktop -GPais=Spain C:\Users\Sebastian\Documents\Tiempo-meteorologico-soapui-project.xml After this we create an Action Concatenation in which we will add these parameters
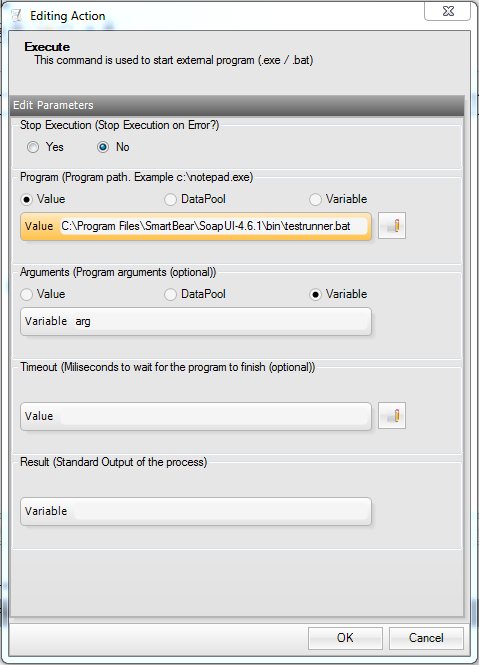
Here we add the parameters that will be used and changed by the value of the datapool. After that you have to make the call to the TestRunner so that we create an Action Execute
Here we put the path where the testrunner.bat and the argument that we define is Concatenation.
Resources
Here are the files to follow the example described.
1. Download the KB sample from this link
2. Download SoapUI project from this link
3. Download GXtest project from this link
