Installation guide
Contents |
Introduction
Requirements for “Tester Client” installation
- Minumun Hardware : Pentium IV with at least 4 GB of RAM and 10 GB free HDD space. Wished: Intel i3 or higher.
- Operating System: Windows XP, Windows Vista, Windows 7, Windows 8.1*, Windows 10.
- Software:
- .NET Framework 2.0 sp 2
- .NET Framekork 3.5
- Optional (recomended):
- Microsoft SQL Server 2005, 2008, 2008R2, 2012, 2014 (also can be the Express version)
- Internet Explorer 8, 9, 10, 11*
(*) In Windows 8.1 and IE11, you may need to disable "Extended Protection mode" in the browser's Internet Options, and run IE as an administrator. More information here
Requirements for “Server Repository” installation
- Minumun Hardware : Pentium IV with at least 4 GB de RAM and 20 GB free HDD space. Wished: Intel i3 or higher.
- Operating System: Windows XP, Windows Vista, Windows 7, Windows 8.1, Windows 10, Windows Server 2008, 2008R2, 2012.
- Software:
- .NET Framework 2.0 sp 2
- .NET Framekork 3.5
- IIS 6.0 or higher including ASP.NET
- Microsoft SQL Server 2005, 2008, 2008R2, 2012, 2014 (also can be the Express version)
- Recomended:
- Microsoft SQL Server 2014
Resources (downloads)
- Download last GXtest version from: http://genexus.com/gxtest
- Microsoft SQL Server 2008 R2 (Express edition): http://www.microsoft.com/sqlserver/2008/en/us/R2Downloads.aspx
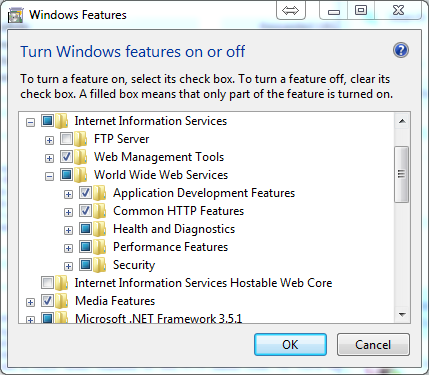
- When installing Server Repository, you must enable IIS in the Windows Features (on the contrary the Server Repository option will appear disabled):
Note: This installation guide is for GXtest 2.0 (and higher) in english version.
Component Details
There are 5 products in GXtest's suite which can be installed either together or separately. Prior to installing it, it is necessary to understand its components as well as the technologies upon which they are based, in order to better understand the installation and configuration. Moreover, GXtest may have distributed components throughout several workstations, therefore, it is necessary to understand how they communicate with one another to properly configure them.
In the online documentation the solution for the most common installation problems as well as its solutions can be found, the address is gxtest.abstracta.com.uy and the information is available under the Support / Troubleshooting category.
1 - GXtest Manager
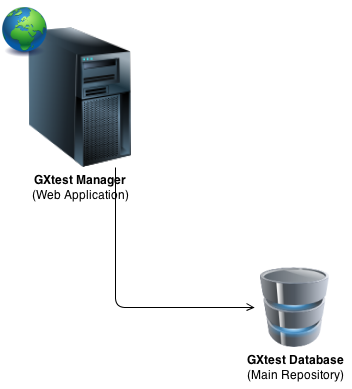
It is a website which is installed in the IIS connecting to an SQL Server database (where the test cases are hosted). It is the central server which concentrates all of the tests which will be executed automatically.
2 - GXtest Designer
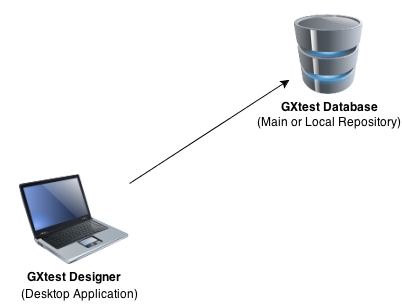
It is a Windows desktop application which connects to an SQL Server database, it is in it where all the test cases are stored. Typically, the installation takes place in the computer where the test cases will be designed, either by the tester or the developer. Also, it is possible to install it without a database and use GXtest Manager database as a unique repository for the test cases.
Se recomienda la instalación de un único repositorio al que acceda GXtest manager y todos los testers con sus instalaciones locales de GXtest Designer.
3 - GXtest Recorder
This product is an Internet Explorer extension, employed for recording the test cases in the application which will be automated. Additionally, it can also be installed as a stand-alone on any computer, for instance, it could be installed by an end-user to report bugs.
4 - GXtest Executor
The executor is the application which handles the execution of scheduled tests, and it is installedd in the workstations that were designated for running the tests. It is usually installed in the same workstations designated for GXtest Manager, though it is also common installing other instances to eiter distribute tests in parallel or in workstations solely dedicated for the execution of automated tests. Note: This is the one component with the largest hardware requirements, for it is the one where all tests will finally be running from.
5 - GXtest Daemon
This is product is installed as a Windows service along with the GXtest Manager and it accesses the same database. Also, it communicates with the GXtest Executor, and with as many as there may be installed and configured in GXtest Manager in order to request the execution of a new test.
Guide
The purpose of this guide, is explaining the necessary steps to follow in order to conduct any of the two typical installations available in GXtest: Tester Client and Server Repository.
Important: Provided some component in GXtest version is installed with a version lesser than 1.2, please, have them uninstalled before proceeding. The aforementioned process may be conducted by going to the Control Panel --> Add or Remove Programs.
Note: Uninstalling GXtest does not delete the database, therefore, while installing a new GXtest all of your previously created projects, as well as your created test cases are kept.
The installation wizard consists of 4 major steps such as:
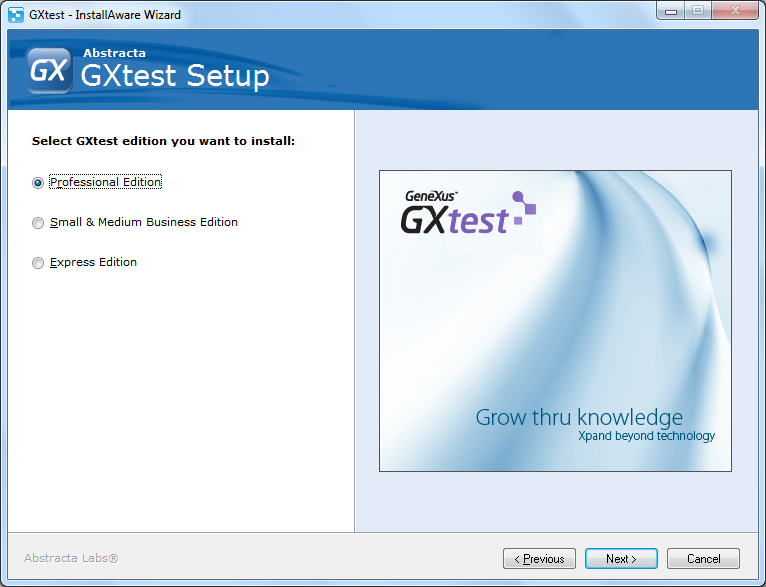
1. Choosing the edition (according to your license)
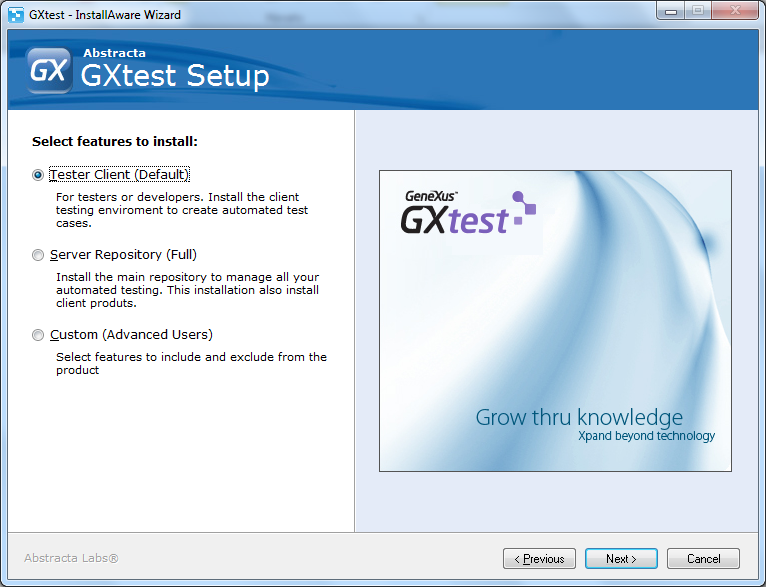
2. Choosing the type of installation (Tester Client / Server Repository / Custom)
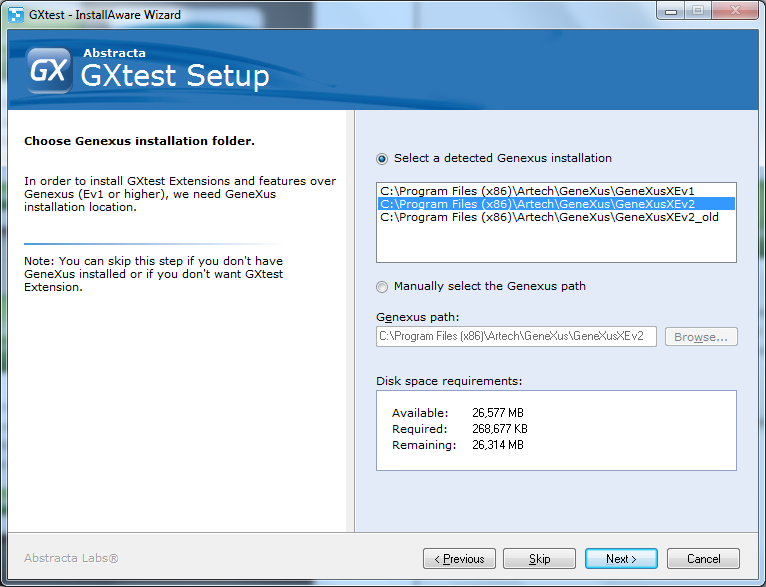
3. Confirm the installation location for GeneXus (this step is optional)
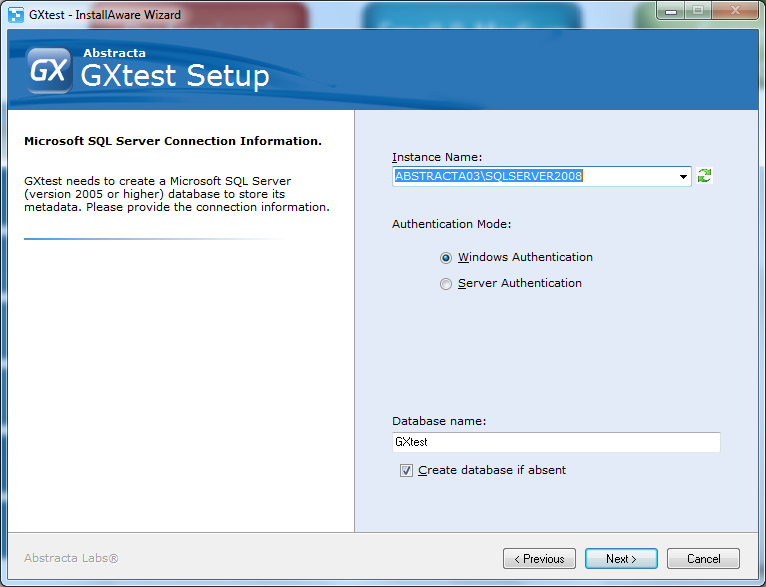
4. Enter the location for the database server
Step 1 - Choose the version you want to install (according to the purchased license)
The differences between the licensing versions in GXtest may be consulted at: GXtest Editions
Step 2 - Choose the type of installation
The 2 most typical installations in GXtest are Tester Client and Server Repository. Las 2 instalaciones más típicas de GXtest son Tester Client y Server Repository. Los componentes y características de los mismos son:
Tester Client: Instalación cliente para testers o desarrolladores.
- GXtest Designer + Recorder: the 2 basic tools to start automating test cases and test how they are executed.
- Provided GeneXus is installed:
- GXtest Extension: It allows performing the export of the metadata from the KB to GXtest.
- GXtest Generator: Automatic tests generation for patterns such as WorkWith and WorkWithPlus with a single click of a button (available only in the Professional Edition)
Server Repository: Full installation for central tests repository.
- Tester Client (Recorder + Designer + Extension + Generator)
- GXtest Manager: Web application for managing the automated tests, environments, agenda and tests execution distribution.
- GXtest Executor: Client for running regression test cases in an unattended fashion (Scheduled from GXtest Manager)
If the Server Repository option is disabled, check that IIS is enabled in Windows Features (See Resources ).
Step 3 - Confirm installation location for GeneXus (optional)
For so long as in the workstation Genexus is installed, then the version which will be initially employed for the creation of the automated tests must be selected, after which, GXtest will continue to install the GXtest Extension, as well as the automatic tests generator available in the Professional Edition.
Step 4 – Create the tests repository (either local or remote)
In this step throughout the installation, a connection to an SQL Server engine is created in order to connect to either an existing repository or create a new one.
Throughout the installation it is paramount not to skip the "Server Repository", bear in mind that test cases must be stored, therefore, a location must be specified.
Throughout the "Tester Client" installation, it is also adviseable creating a local database for working locally, although and for so long as it may have already been installed, it is possible to connect directly to the Server Repository.
Step 5 – License Authorization
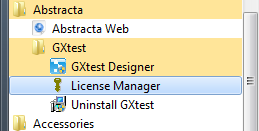
No sooner is the installation completed, in order to authorize the license locally, please open GeneXus License Manager from the GXtest installation folder, available from Windows--> All Programs--> Abstracta--> GXtest.
- In order to authorize the license follow the process as explained in the GeneXus' site (read more...)
- In the event you are using GeneXus Protection Server, make sure to authorize the license in that installation.
Should you not find the GXtest products from the list available from the GeneXus License Manager, then a Windows registry file needs to be executed, and it is available in the GXtest installation folder, that is usually located at: C:\Program Files (x86)\Abstracta\GXtest Designer\ prodGXtest.reg
Afterwars, make sure to open GeneXus License Manager anew.
In the event of coming across with inconveniets with the activation of the license, then please either get in contact with you retailer, or send an email to claves@artech.com.uy
Step 6 – Enable GXtest Recorder
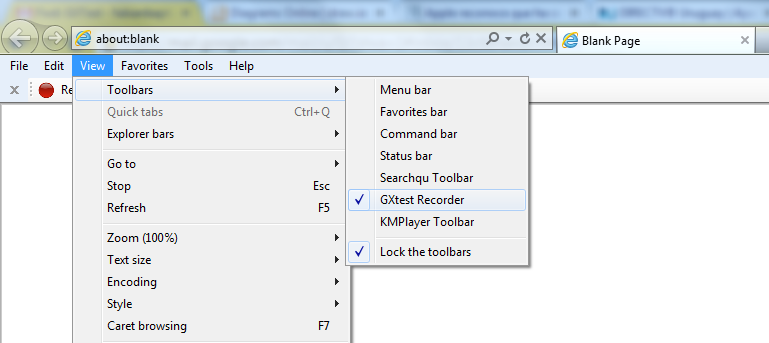
After the installation is completed, take into account that the toolbar extension for GXtest in Internet Explorer needs to be enabled: such procedure can be conducted from: View / Toolbars / GXtest Recorder
Common installation of GXtest components
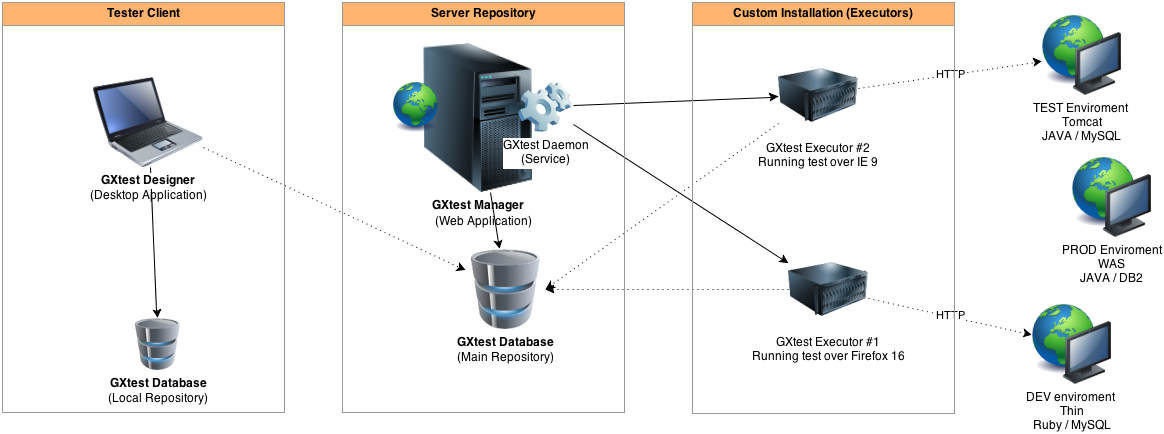
As an example, below is shown a possible distribution for GXtest components on different machines.
- 1 Tester Client for the tester who will create the test cases.
- 1 Server Repository to manage and schedule executions on different machines
- 2 Custom Installations on other two machines, where the scheduled tests will execute (needs the browser installed in order to run the test)
