Building JMeter scripts with GXtest
Contents |
JMeter
JMeter is an open source tool for performance testing and it is used for automating test cases, generating scripts that contain the http (or https) requests executed in each test case, and it allows modifications in order to perform some actions (such as introducing validations, conditions, parameterizations, etc.).
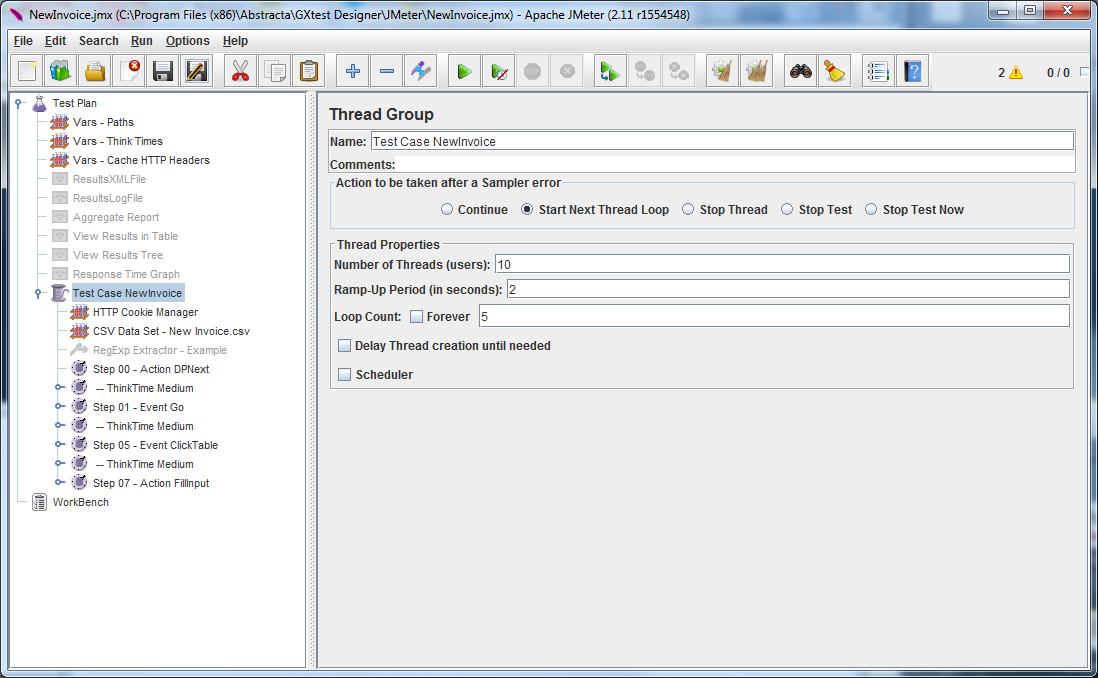
JMeter allows us to mount test scenarios where we can define the amount of active users, the number of iterations, the way in which users access the system and other options that let us represent the most realistic scenario. The figure below shows an example of a JMeter test plan.
Alike OpenSTA, a drawback of JMeter is the test case recording process. When recording the test cases we get a script with the http requests that were made, therefore, for someone that has no knowledge of the application, it will be really difficult to identify each step, or what each request does. Many times, in order to have a clearer script, we can introduce comments between each step during the recording, as well as timers that control the timing of each step. If on top of that, we want to add validations or parameterized variables, we can conclude that doing a script with JMeter is a tedious task and it may be annoying in those projects where the application’s code is being constantly changed, which means that the scripts have to be often re-generated.
It is advisable for a performance project that JMeter measurements are complemented with GX monitoring tools, such as JMX.
Generating JMeter scripts with GXtest
GXtest can generate JMeter scripts from a previously recorded test case. This gives many advantages to the tester:
- Recording the test cases with GXtest, which is done in a much more practical way and allows to add validations and more options which are mentioned in other articles.
- Automatization of the most tedious parts of the script, without the need of wasting time in executing repetitive tasks.
- In the event of a change in the application, the possibility of taking those changes to GXtest and then re-generate the scripts in an easy way, without the need of recording them again in GXtest.
- No need of introducing validations manually, timers or parametrizations. Normally, this turns into a considerably long task and usually presents problems. GXtest automatically introduces all these elements.
- Having the secondary requests (css, gif, jpg, js, etc.) in separate files, away from the primary ones. This allows to have a clearer script which makes analysing easier.
- The use of debugging flags that condition the secondary requests and log messages.
- Support of NTLM authentication.
- Automatical management of all redirects.
How does the script generator works?
The performance script is created by clicking the GXtest Designer button "Generate JMeter scripts".
When sending the request to create an JMeter script, the test case will start executing as usual in the user’s screen. Nevertheless, there are many different actions happening internally: in the course of the test case execution, a xml file is created with all the GXtest commands that are being used in the test, while http requests are recorded into a saz extension file. This files are left inside a folder with the name of the test case, where the GXtest Designer is installed, normally in: Abstracta\GXtest Designer\Performance\ExecutionLog\.
The saz format belongs to the Fiddler tool, which is a proxy that records http traffic between Internet and the PC, that then can be analyzed by introducing breakpoints, editing requests at protocol level, etc.
With these two files (xml and saz), the JMeter test plan is generated using GXtest commands from the xml file and http(s) requests from the saz file. Once the execution is completed, the resulting script will have each GXtest command that was executed, associated with the http(s) requests that are involved in each of them, with their appropriate timers, and in the case they have been introduced, the corresponding validations. The resulting file is created in the folder Abstracta\GXtest Designer\JMeter.
In general, the resulting scripts are ready to be executed without doing any changes. Although, depending on the system, some modifications might be done to add conditions, variables, validations, etc., so the script will behave as real as possible.
How to import the generated file into JMeter?
After the test case is executed from GXtest Designer, the JMeter test plan generated will be available in GXtest installation folder Abstracta\GXtest Designer\JMeter.
The generated file will have the jmx extension, and it can be open from the File -> Open JMeter's menu.
Installing JMeter
JMeter is a free tool and can be downloaded from its web site
Summary
GXtest allows to create scripts to use in performance tests with the JMeter tool. When generating the scripts from GXtest, the tester saves loads of time from doing repetitive tasks, and it gives him the possibility to focus on other activities to reduce the amount of performance errors and therefore obtain a better quality product.
