Quick Start
This article will show you in a easy way how to record and execute a test case. Before beginning must have installed and activated GXtest Designer (see the Installation guide).
Se trabajará con la aplicación AjaxSample. Para comenzar se debe cargar los proyectos de ejemplo desde el menú Help -> Load Sample Projects. Esta opción cargará un proyecto de ejemplo llamado "Demo GXtest - Ajax Sample".
We will work with the application AjaxSample. To begin you must load the sample projects from the "Help -> Load Sample Projects" menu. This option will load a sample project named "Demo GXtest - Ajax Sample KB".
Open GXtest
Access via the shortcut to GXtest created on the desktop. The first thing that will open the Login window:
- This window may not appear if you have only one connection already configured.
In this window you can select the user to access and the repository of test cases to connect. Press Ok.
Open the Demo Project
In GXtest you work in projects, so the first thing to do is open the test project. For this, select Project-> Open Project and then select the project named "Demo GXtest - Ajax Sample KB".
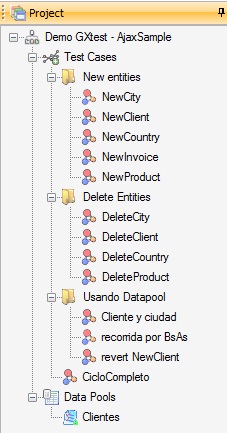
When you open the project you will see in the right panel all elements of it.
In that one there are several test cases and datapools.
Record a test case
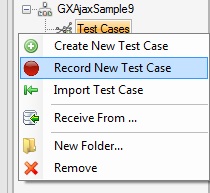
To record a test case right-click on the "Test Cases" node and then select "TestCase-> Record New Test Case":
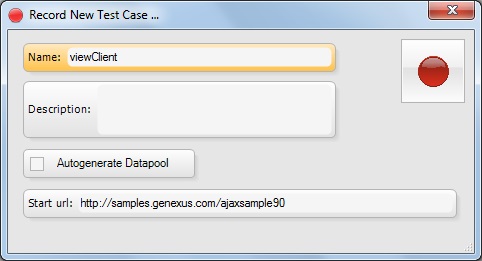
This will open the following window
Here indicate a name (ViewClient) and press the red button to start recording. This changes the window state to "recording". At the same time Internet Explorer is opened to begin recording our test case. Once opened, perform the following steps in application:
- Click on the link "Work With Clients". After that a window will be opened asking which was the criteria for clicking on that row of the grid. Press the "OK" button to indicate that it was clicked because it is the second row. In GXtest every time you perform an action on an item placed on a grid, GXtest will ask why you have chose that row of the grid. For more information about this topic read the manual GXtest Recorder User's Manual.
- In the "Client Name" insert "Abstracta" and then press the button "Search"
- Click on the link "Abstracta" found in the results grid. Again, a window opens to ask selection criteria, in which press "OK".
- Select the "Abstracta" text field and press the button
 for validations, in the GXtest Recorder. This will open a window with the list of validations that can be performed while recording the test case. Select "AppearText" validation, which tells GXtest to validate whether this text appears in the page.
- Finally close the browser
When we finish recording in the central area of the GXtest will appear the test case modeled as a directed graph, similar to the following figure
- If the "PressKey(Tab)" command does not appear in the test case, please verify that the setting "Record Tabs" is enabled, in the GXtest Recorder configuration screen.
Execute the test case
You already have the test case ready to run. For that press the run button in the GXtest Designer toolbar or Shift + F5:
This will cause the browser to open and begin playing the actions we recordered before. Keep in mind that if "Abstracta" doesn't exist in the application under test, the execution will fail.
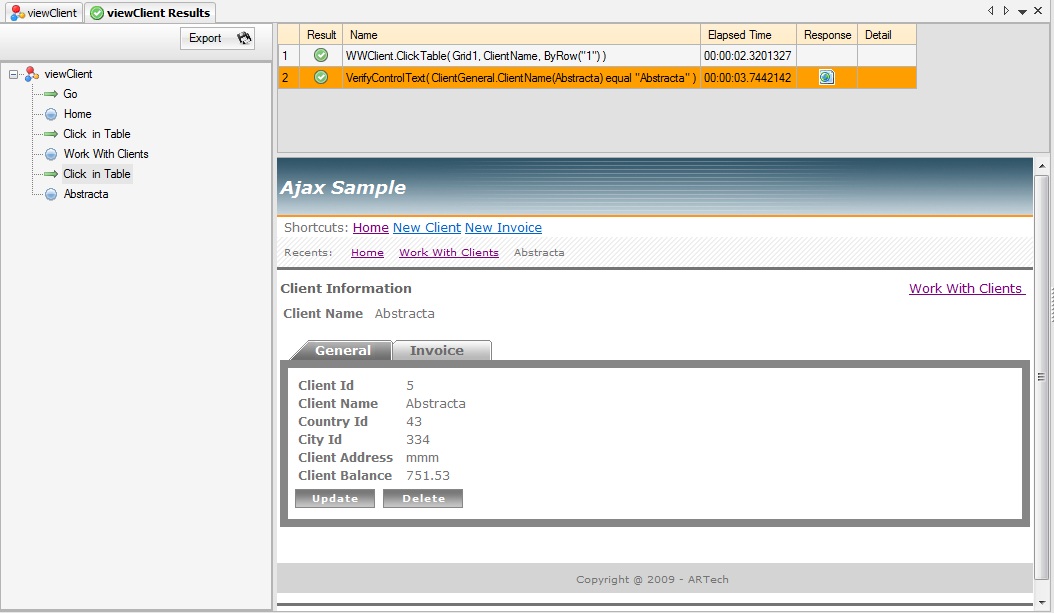
The following image we can see how GXtest shows the results:
You have just executed your first test case!
If you want to know the full potential of the GXtest you should continue here: GXtest Designer Tutorial


