Difference between revisions of "Creating an Embedded Test Case"
Amyjumyhawu (Talk | contribs) |
m (Reverted edits by Amyjumyhawu (Talk) to last version by Ftoledo) |
||
| Line 1: | Line 1: | ||
| − | |||
| − | |||
| − | |||
| − | |||
| − | |||
| − | |||
| − | |||
| − | |||
__NOTOC__ | __NOTOC__ | ||
[[category:GXtest Guides]] | [[category:GXtest Guides]] | ||
| Line 24: | Line 16: | ||
== Creating the SearchClient Test Case == | == Creating the SearchClient Test Case == | ||
| − | To do this the first step is to create the SearchClient Test Case. To do so click on Test Cases | + | To do this the first step is to create the SearchClient Test Case. To do so click on Test Cases > New. |
Then enter the name SearchClient. | Then enter the name SearchClient. | ||
Revision as of 18:55, 24 November 2010
Introduction
Many times there are a series of steps that are repeated within a Test Case. When this is the case it is desirable to reuse Test Cases that already have the steps modeled. To accomplish this GXtest allows you to embed test cases.
In the example you will modify the Test Case SeeCliente that was already created in the step Starting out with GXtest.
The idea is to separate it into two test cases:
- SearchClient : that looks for the client and
- SeeCliente: that once the client has been searched, view is clicked
Conceptually, what you want to happen is that the Test Case SeeCliente is divided in the way that is shown in the following image:
Creating the SearchClient Test Case
To do this the first step is to create the SearchClient Test Case. To do so click on Test Cases > New. Then enter the name SearchClient.
Copying elements from SeeClient to SearchClient
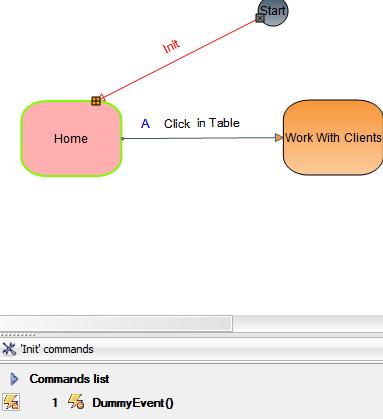
Go to the SeeClient Test Case and select the Home and Work With Clients nodes and the edge line the joins the two. Then press Ctrl+C. Then open the Test Case SearchClient and press Ctrl+V. All of the copied nodes will now appear in the SeeClient Test Case. Join the edge line Init to the Home node. Then add the DummyEvent event to the edge line Init. The Test Case ought to look like the following:
Including the SearchClient Test Case in SeeClient
Now you can include the Test Case created before. Before anything else, open SeeClient and delete the Home node and the edge line that comes out of Home. Then delete the commands within Work With Clients.
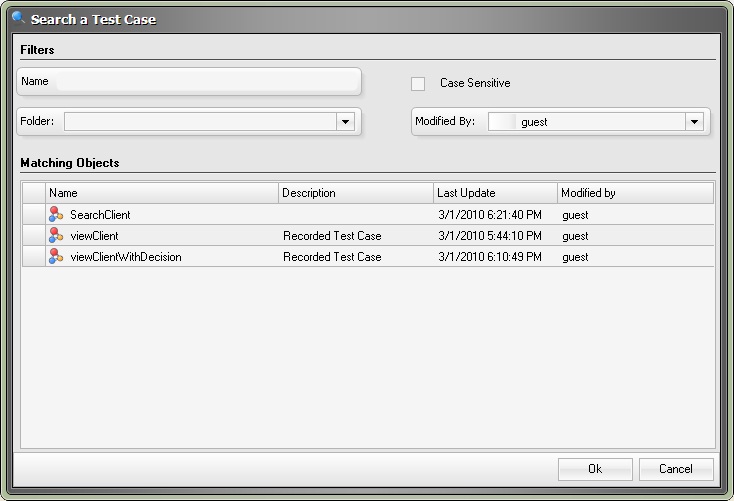
Now drag the Test Case element from the left panel on the screen to where it will become part of the model. It will then display a window that allows you choose the Test Case:
Choose the SearchClient Test Case. Join the Go edge line to the SearchClient element and add an edge line from the element to the Work With Clients node. Add a DummyEvent event to the edge line that connects the SearchClient Test Case to the Work With Clients node.
The Test Case SeeClient ought to look like the following:
Testing the Test Case
The embedded test case is now ready. Run it!


