Difference between revisions of "GXUnit User Guide"
(→Asserts) |
|||
| (7 intermediate revisions by 3 users not shown) | |||
| Line 1: | Line 1: | ||
GXUnit User Guide | GXUnit User Guide | ||
| − | + | {{Idiomas|GXUnit|GXUnit User Guide|GXUnit User Guide}} | |
== Introduction == | == Introduction == | ||
| Line 32: | Line 32: | ||
[[image:GXunit_installation2.png|center]] | [[image:GXunit_installation2.png|center]] | ||
| − | + | All detected Genexus installations are listed in this screen. If your installation is not listed, you can manually select the path of the GeneXus.exe file. | |
[[image:GXunit_installation3.png|center]] | [[image:GXunit_installation3.png|center]] | ||
| Line 46: | Line 46: | ||
[[image:GXunit_create.png|center]] | [[image:GXunit_create.png|center]] | ||
| − | === Deleting | + | === Deleting GXUnit's objects === |
| − | There is a feature available in the menu, which deletes all | + | There is a feature available in the menu, which deletes all objects related with GXUnit, including objects of the type TestCase as well as Suites having been created. |
| Line 55: | Line 55: | ||
| − | == Tool window | + | == GXUnit's Tool window == |
| − | In order to work with | + | In order to work with GXUnit, 'tool window' must be enabled. From that tool, we may see all the test suites, as well as all of the test cases which were defined. |
| Line 67: | Line 67: | ||
| − | A Test Suite is a set of Test Cases, grouped according to a specific end-users' criteria. Creating a new test suite is a simple process, with either just a right click on top of one of the already existing test suites or, clicking anywhere in the 'tool window | + | A Test Suite is a set of Test Cases, grouped according to a specific end-users' criteria. Creating a new test suite is a simple process, with either just a right click on top of one of the already existing test suites or, clicking anywhere in the GXUnit's tool window so that a first level suite is created. |
[[image:GXunit_suite1.png|center]] | [[image:GXunit_suite1.png|center]] | ||
| Line 88: | Line 88: | ||
[[image:GXunit_create2.png|center]] | [[image:GXunit_create2.png|center]] | ||
| − | The object Test Case will have an editor, which will support the syntax of the object Procedure for invoking any other GeneXus' object, after which, it | + | The object Test Case will have an editor, which will support the syntax of the object Procedure for invoking any other GeneXus' object, after which, it will run certain comparisons invoking the object of the type Assert, also described in this document. |
As a new Test Case is created, GeneXus code is automatically generated where the object under test is invoked, and some asserts are conducted in order to evaluate the results obtained. The objective is modifying this code so that it will meet the users needs. | As a new Test Case is created, GeneXus code is automatically generated where the object under test is invoked, and some asserts are conducted in order to evaluate the results obtained. The objective is modifying this code so that it will meet the users needs. | ||
| Line 139: | Line 139: | ||
| − | + | The GXUnit's tool window contains all the sets of Test Cases grouped together in its respective Test Suites. | |
[[image:GXunit_execution.png|center]] | [[image:GXunit_execution.png|center]] | ||
| − | + | Ticking on the checkbox corresponding to a test case, will select it for executing it, after which, pressing on the button "Test" will create a new procedure named 'RunnerProcedure'. The previously mentioned procedure will have calls to all the tests to be executed, as well as have generated all of the necessary objects. | |
| − | + | ||
=== Seeing the Results === | === Seeing the Results === | ||
| − | + | After having executed all of the test cases, an object of the type Result is created, which will save and store the results from the tests conducted. That object will be created with the execution date and time in its name. In the header the tests executed are displayed, along with the amount of failed ones. The Asserts which fail, will be shown in red with the detail for failure, whereas those tests successfully completing its execution will be shown in green. | |
[[image:GXunit_results.png|center]] | [[image:GXunit_results.png|center]] | ||
| − | == | + | == Exporting and Importing Test Cases as well as Results == |
| − | + | Test Cases, Test Suites as well as objects Result, can be exported and imported across the different knowledge bases installed in the tool, just as it happens with any other GeneXus object. | |
| − | + | ||
== Running tests using MSBuild tasks == | == Running tests using MSBuild tasks == | ||
| − | + | In GXUnit.dll, which can be located in the following directory "<GeneXus installation directory>\Packages", two MSBuild tasks are defined, such as, GenerateGXUnitTests and GenerateGXUnitResults so that all of the tests can be executed from an MSBuild script. For using them, those need to be imported in the MSBuild script. | |
| − | + | An example for using tasks, as well as using tasks defined by GeneXus, is the following one: | |
| − | + | ||
<Target Name="GXUnit"> <BR> | <Target Name="GXUnit"> <BR> | ||
Latest revision as of 14:06, 12 June 2014
GXUnit User Guide
Contents |
Introduction
This document aims at displaying the core features available through GXUnit, the Genexus' unit testing tool.
In the following page, you will find the following How to's:
- Installing GXUnit
- Creating your unit tests
- Running tests in an interactive manner and seeing the results
- Running your tests with a batch (msbuild)
Installation
GXUnit is free and can be downloaded from GeneXus' marketplace.
Installer
Next you will be shown with the necessary steps for installing GXUnit.
Installer windows:
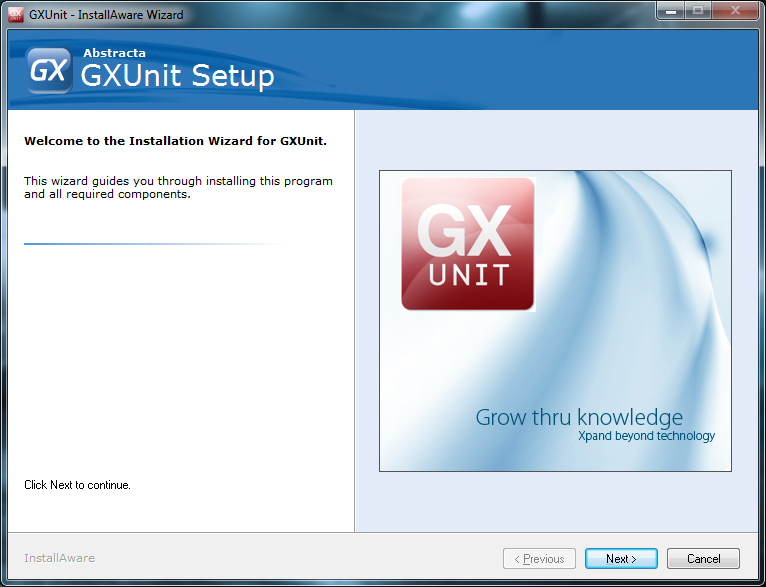
- Welcome screen
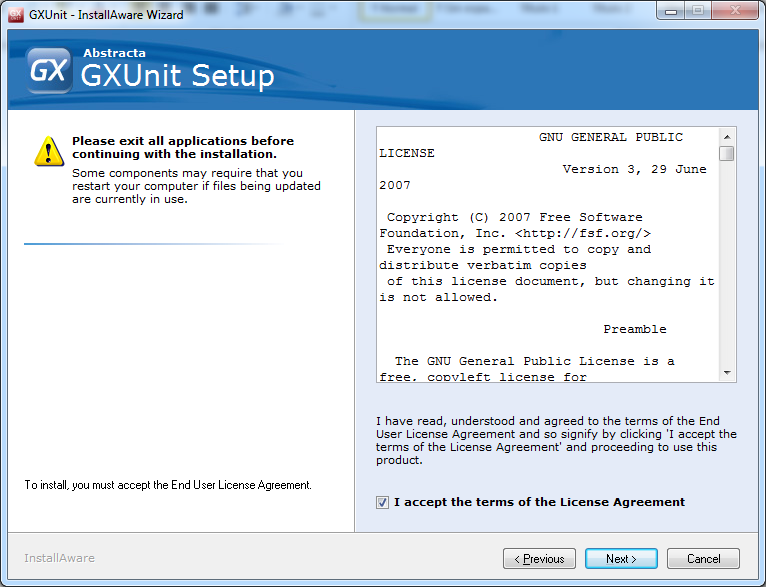
- License agreement
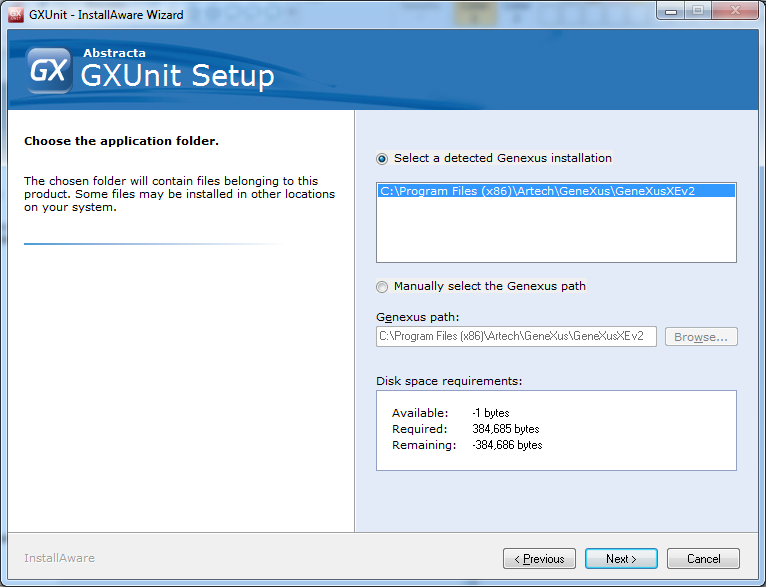
- Selecting your GeneXus installation
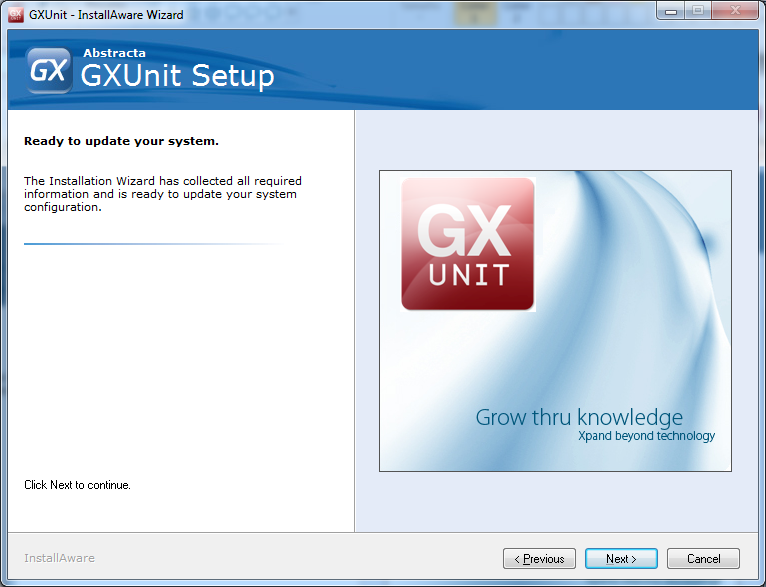
- Ready for installing it
All detected Genexus installations are listed in this screen. If your installation is not listed, you can manually select the path of the GeneXus.exe file.
Initializing GXUnit
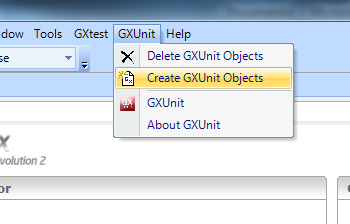
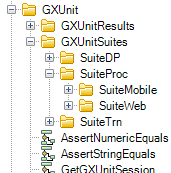
In order to initialize GXUnit, it must be done from an option available in the GXUnit menu. By proceeding in that way, the set of necessary objects for employing them with the tool will be created. The aforementioned objects are placed in a directory named GXUnit, underneath the objects' tree.
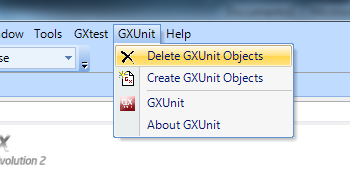
Deleting GXUnit's objects
There is a feature available in the menu, which deletes all objects related with GXUnit, including objects of the type TestCase as well as Suites having been created.
GXUnit's Tool window
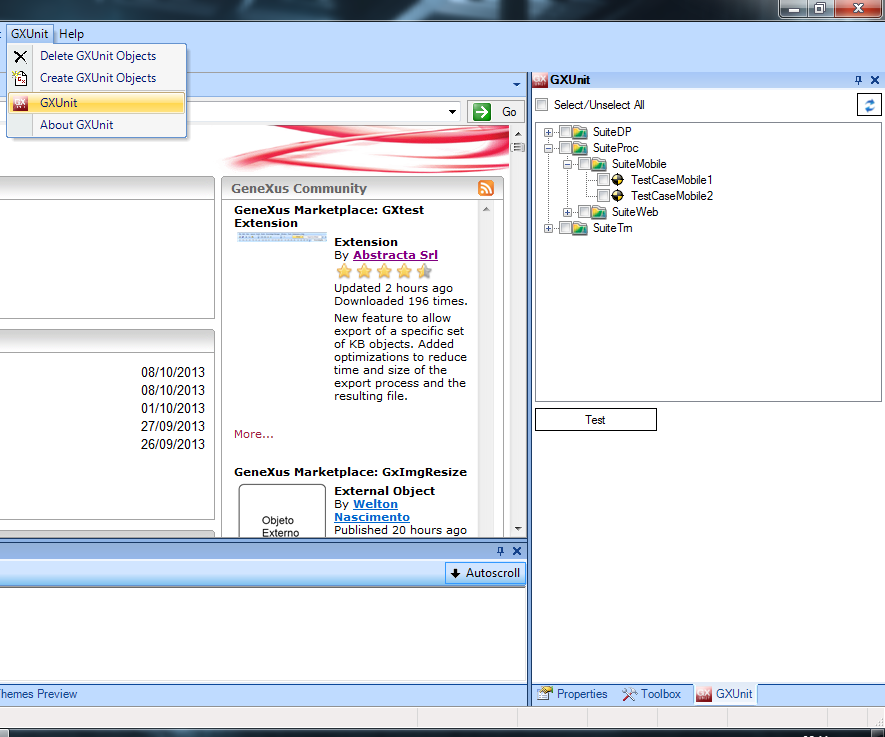
In order to work with GXUnit, 'tool window' must be enabled. From that tool, we may see all the test suites, as well as all of the test cases which were defined.
Test Suite
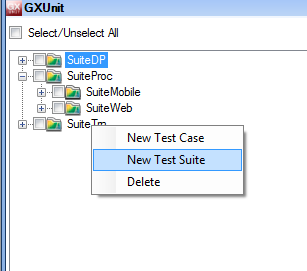
A Test Suite is a set of Test Cases, grouped according to a specific end-users' criteria. Creating a new test suite is a simple process, with either just a right click on top of one of the already existing test suites or, clicking anywhere in the GXUnit's tool window so that a first level suite is created.
After selecting the 'New Test Suite' option, its name is asked and after inserting it a new 'Folder GeneXus' is created under the 'Objects/GXUnitSuites' structure.
Test Case
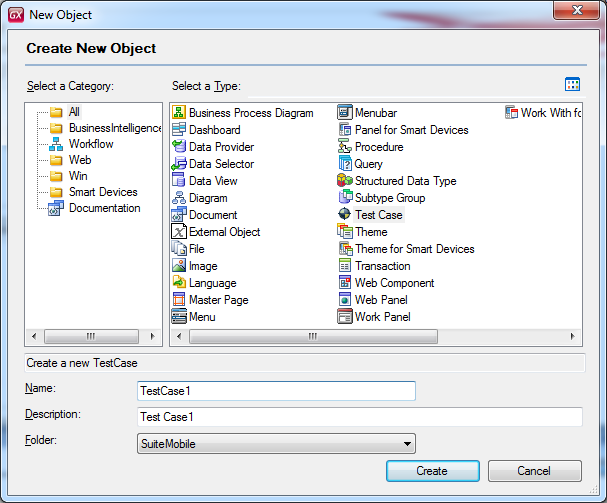
When creating a new Test Case, right click on a Test Suite and select New Test Case. In the dialog box for the GeneXus object, choose the option related to Test Case, afterwards, select Test Suite to be the destination folder for it.
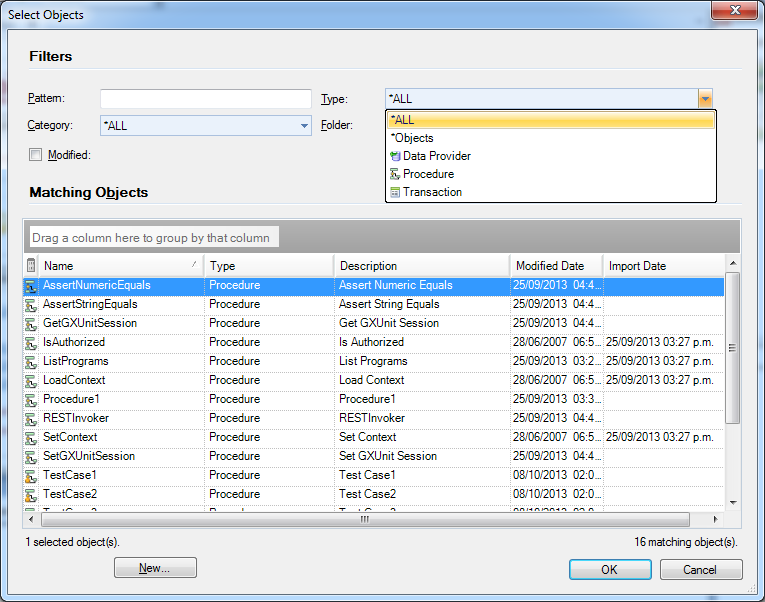
When creating a new object of this type, it is necessary to establish the object it is associated with. In this version the following objects may be selected Procedures, DataProvider, Transactions.
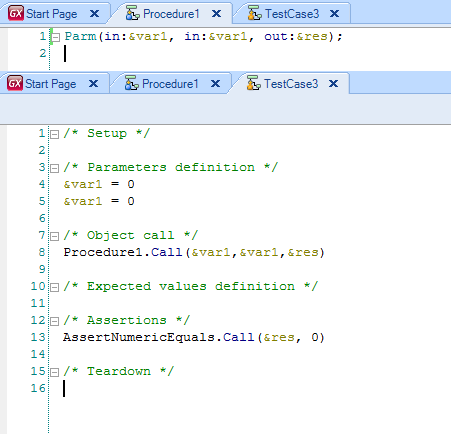
The object Test Case will have an editor, which will support the syntax of the object Procedure for invoking any other GeneXus' object, after which, it will run certain comparisons invoking the object of the type Assert, also described in this document. As a new Test Case is created, GeneXus code is automatically generated where the object under test is invoked, and some asserts are conducted in order to evaluate the results obtained. The objective is modifying this code so that it will meet the users needs.
GeneXus Procedures Testing
In the event that the object associated to the Test Cases is a procedure, then a variable is created for each one of them in the rule "Parm" found in the procedure under test. Also, and depending on it being either input or input/output, it may be initialized with a default value, or evaluated with an Assert.
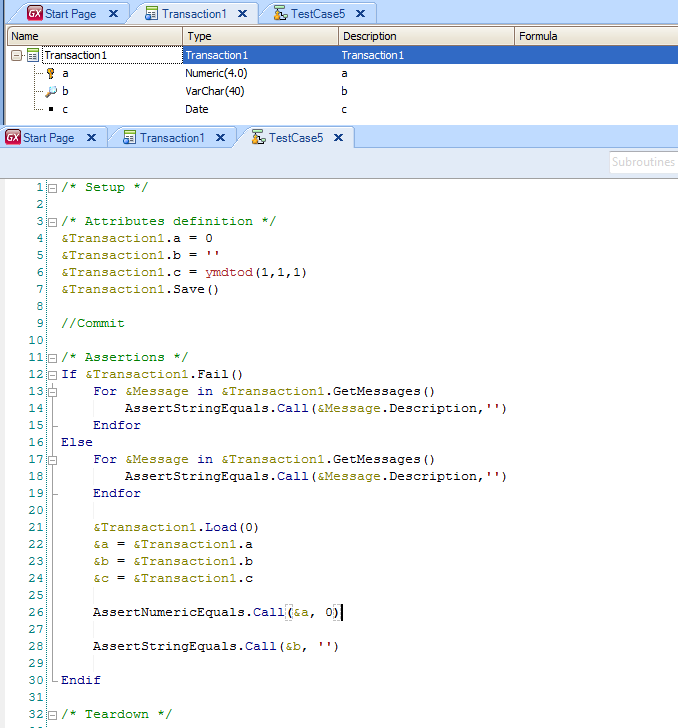
Transactions Testing (BC)
Whilst creating a new test case associated to a Transaction with the property Business Component, GeneXus' code is generated by default in the following manner::
- A variable of the type transaction BC is defined
- Afterwards, it is initialised with a default value for all of the attributes
- Saves the data
- Loads the data
- For each message of the Transaction an assert is conducted
- For each Business Component attribute an assert is conducted
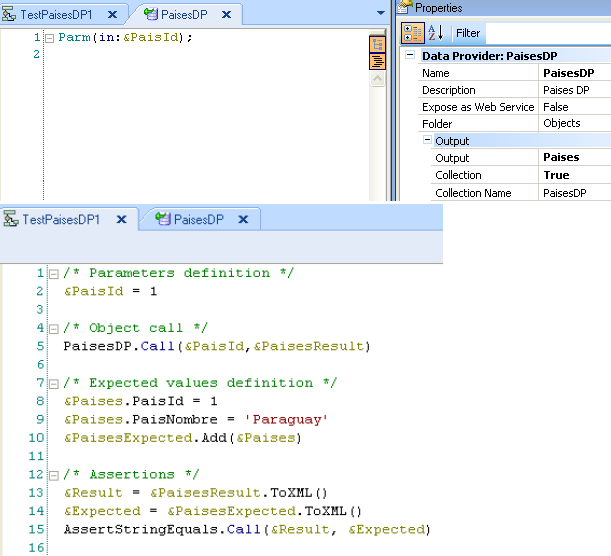
Data Providers Testing
Whilst creating a new test case associated to a Data Provider, Genexus' code is generated by default in the following manner:
- The input parameters fo the DP are initialized
- Afterwards, the Data Provider is invoked
- The expected result is initialized (BC o SDT)
- In order to compare the expect output against the obtained, an AssertStringEquals is performed
Asserts
The Assert methods are employed to compare the results obtained after running the objects under test, against the expected results for the very same objects. The following two methods are provided, AssertNumericEquals and AssertStringEquals, so that variables of the type number as well as, variables of the type strings can be compared respectively. Those procedures are created when GXUnit is initialized and are part of the KB.
When running one of those methods, the results will be saved for later evaluation of the results obtained from the executed tests.
Running Test Cases
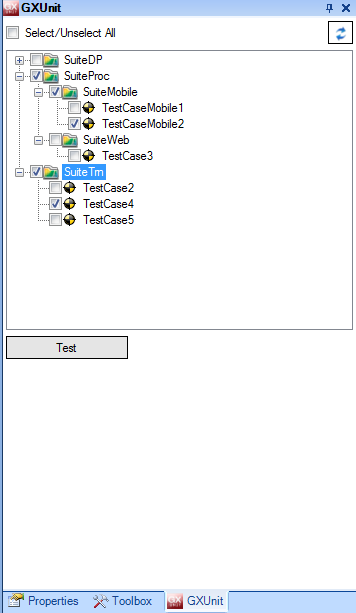
The GXUnit's tool window contains all the sets of Test Cases grouped together in its respective Test Suites.
Ticking on the checkbox corresponding to a test case, will select it for executing it, after which, pressing on the button "Test" will create a new procedure named 'RunnerProcedure'. The previously mentioned procedure will have calls to all the tests to be executed, as well as have generated all of the necessary objects.
Seeing the Results
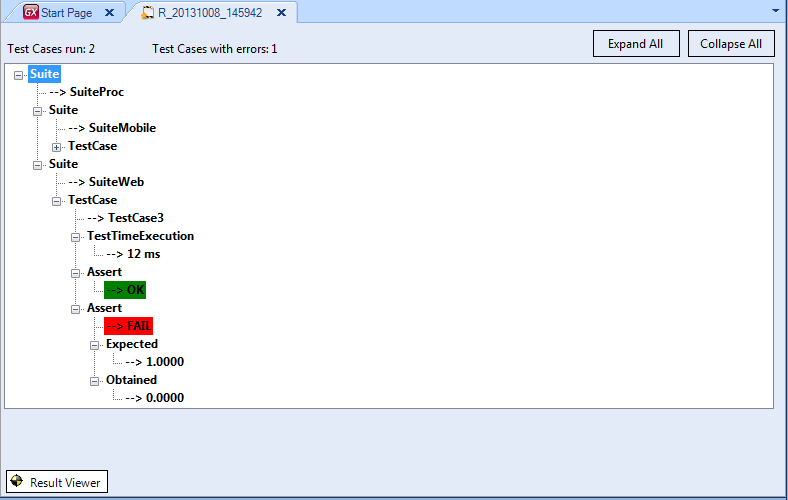
After having executed all of the test cases, an object of the type Result is created, which will save and store the results from the tests conducted. That object will be created with the execution date and time in its name. In the header the tests executed are displayed, along with the amount of failed ones. The Asserts which fail, will be shown in red with the detail for failure, whereas those tests successfully completing its execution will be shown in green.
Exporting and Importing Test Cases as well as Results
Test Cases, Test Suites as well as objects Result, can be exported and imported across the different knowledge bases installed in the tool, just as it happens with any other GeneXus object.
Running tests using MSBuild tasks
In GXUnit.dll, which can be located in the following directory "<GeneXus installation directory>\Packages", two MSBuild tasks are defined, such as, GenerateGXUnitTests and GenerateGXUnitResults so that all of the tests can be executed from an MSBuild script. For using them, those need to be imported in the MSBuild script. An example for using tasks, as well as using tasks defined by GeneXus, is the following one:
<Target Name="GXUnit">
<OpenKnowledgeBase Directory="Path a la KB"/>
<GenerateGXUnitTests>
<Output TaskParameter="XMLName" PropertyName="XMLName" />
</GenerateGXUnitTests>
<BuildOne ObjectName="RunnerProcedure" ForceRebuild="true" />
<Run ObjectName="RunnerProcedure" />
<GenerateGXUnitResults XMLName="$(XMLName)"/>
<CloseKnowledgeBase />
</Target>
